5. Clear Stamp and Die of the month (CDOM) called Storytime Gnomes along with the Stencil of the month, Glimmer of the month, and 3D Embossing Folder of the month:
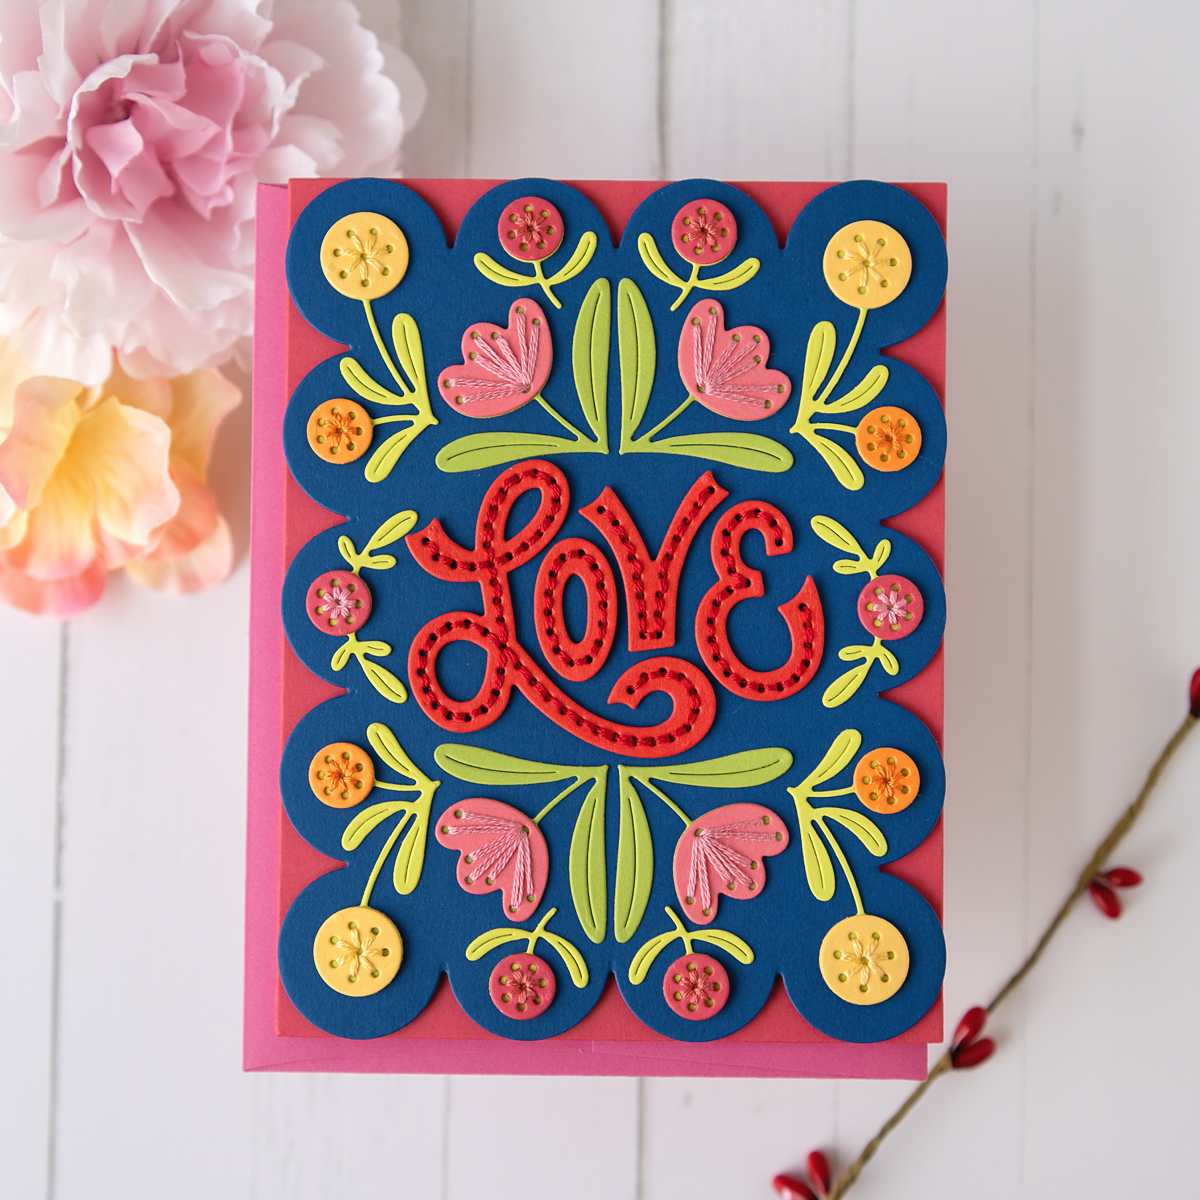
6. Embossing Folder of the Month (EOM) called Checkered Scallops, along with Stitching Die of the Month, and Glimmer of the Month for the sentiment:
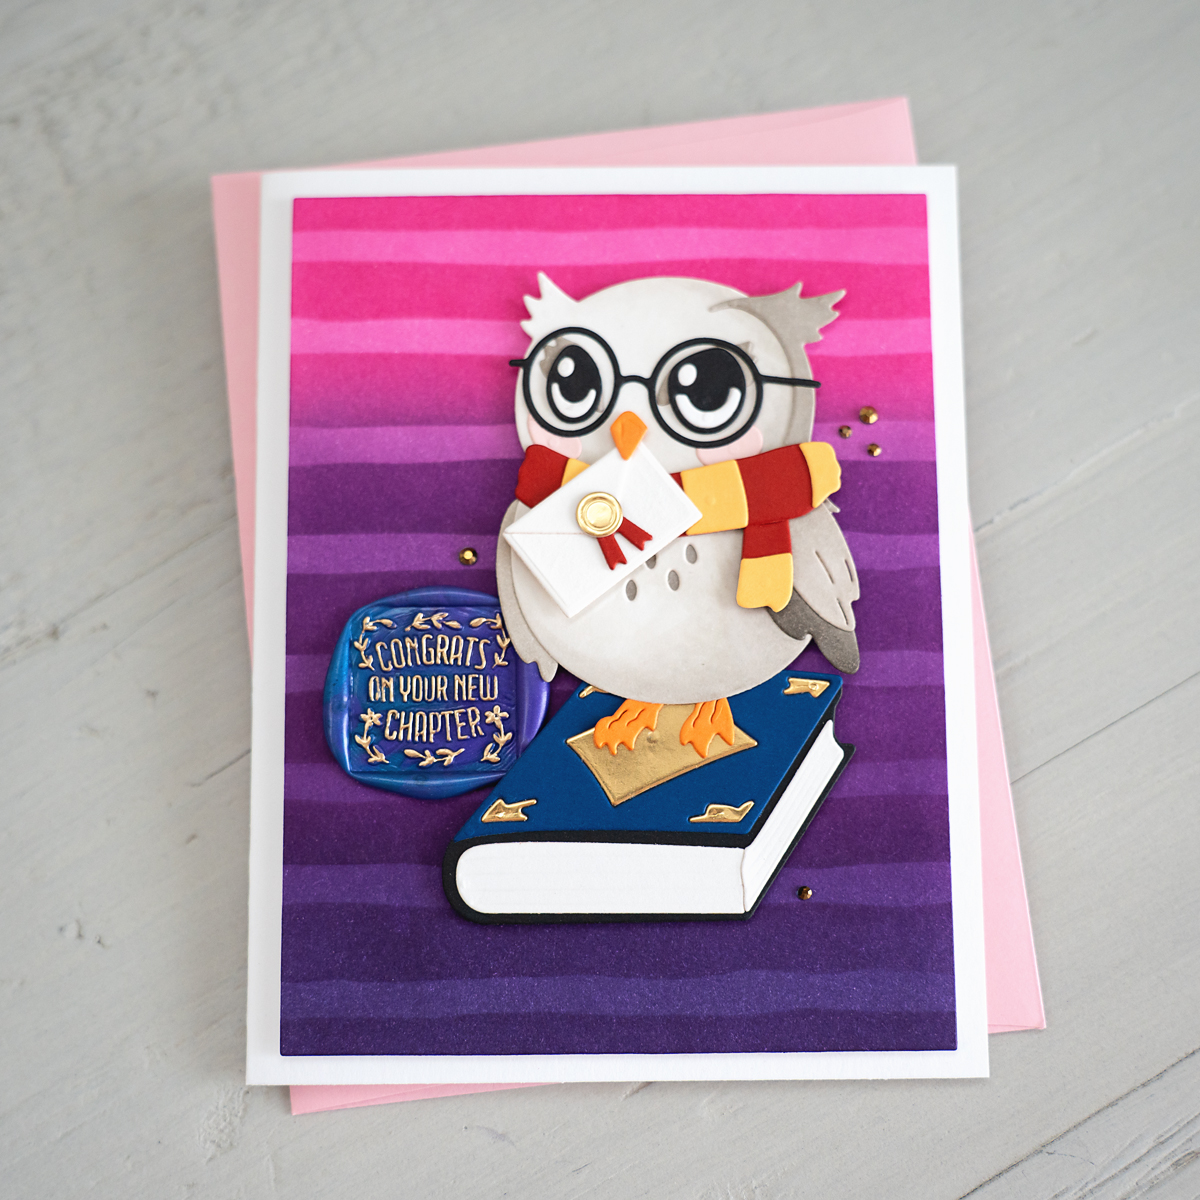
8. Wax Seal of the Month (WSOM) called Congrats on Your New Chapter, along with the Glimmer of the month in the background, and the book dies from the Large Die of the Month:
10. The Bonus Item for March is the cute castle dies, and comes for free when you join the Deluxe Caboodle Value Club, which is all the clubs combined:
I love reading, so I loved this month’s club kits. I hope you got some inspiration from my cards today. Check out the Spellbinders site to see all the club kits, along with lots of other paper crafting goodies.
Hello crafty friends! Welcome to the Pinkfresh Studio February 2024 Pure Joy Release and blog hop. You should have come from Isha Gupta’s blog, and the next step on the blog hop after me is Karin Hogger. You can always go to the Pinkfresh Studio blog for a full list of the blog hop. There will also be giveaways for this blog hop, and I will list that information at the end of the post.
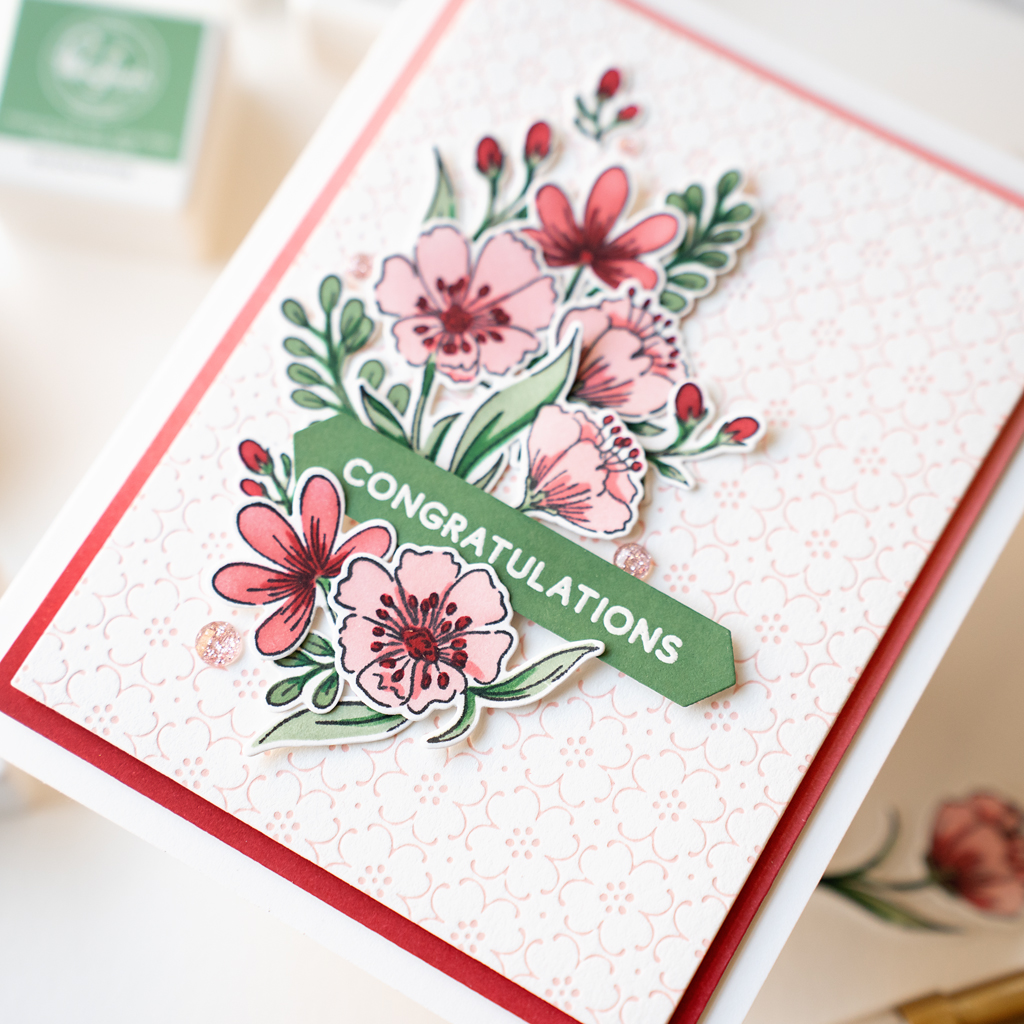
I love the Spring florals in this release. I made a card featuring soft pink florals using the Breezy Blossoms collection.
For the background, I used the Dotted Petals press plate, peony ink, and my BetterPress system. I love the subtle texture and color this press plate adds to my background panel. I trimmed it down, and adhered the flowers to the left side of the panel. For the sentiment, I stamped the Basic Banners: Celebrate stamps on white cardstock with Versamark ink. I heat set it with white embossing powder. I wanted the sentiment to coordinate with the florals, so I used one of the green inks, and ink blended it on top of the heat set “Congratulations” sentiment. Then, I used the Basic Banners coordinating cuts to die cut them out. I nestled the sentiment banner in with the florals.
I needed just a little more color, so I decided to mat the panel. On another piece of white cardstock, I used the pink inks to blend an ombre pink panel. I adhered the floral panel to the ombre panel, then adhered to an A2 white cardbase.
I love how soft and fresh my card turned out. I am ready to see all the Spring flowers blooming! I hope you got some inspiration from my card. Don’t forget to hop along to see more inspiration from this release.
Pinkfresh Studio is giving away the full release on the Pinkfresh Studio blog and YT channel.
Pinkfresh Studio will also be giving away a total of 10 $25 gift cards from the comments along the hop
Pinkfresh Studio will post the winners on Mar 5, 2024 on the GIVEAWAY PAGE. You must check that page to see if you are a winner. If you are a winner, you must claim your prize within 2 weeks.
Hello crafty friends! It’s a new month, and I have my monthly round up of the Spellbinders February 2024 club kits.
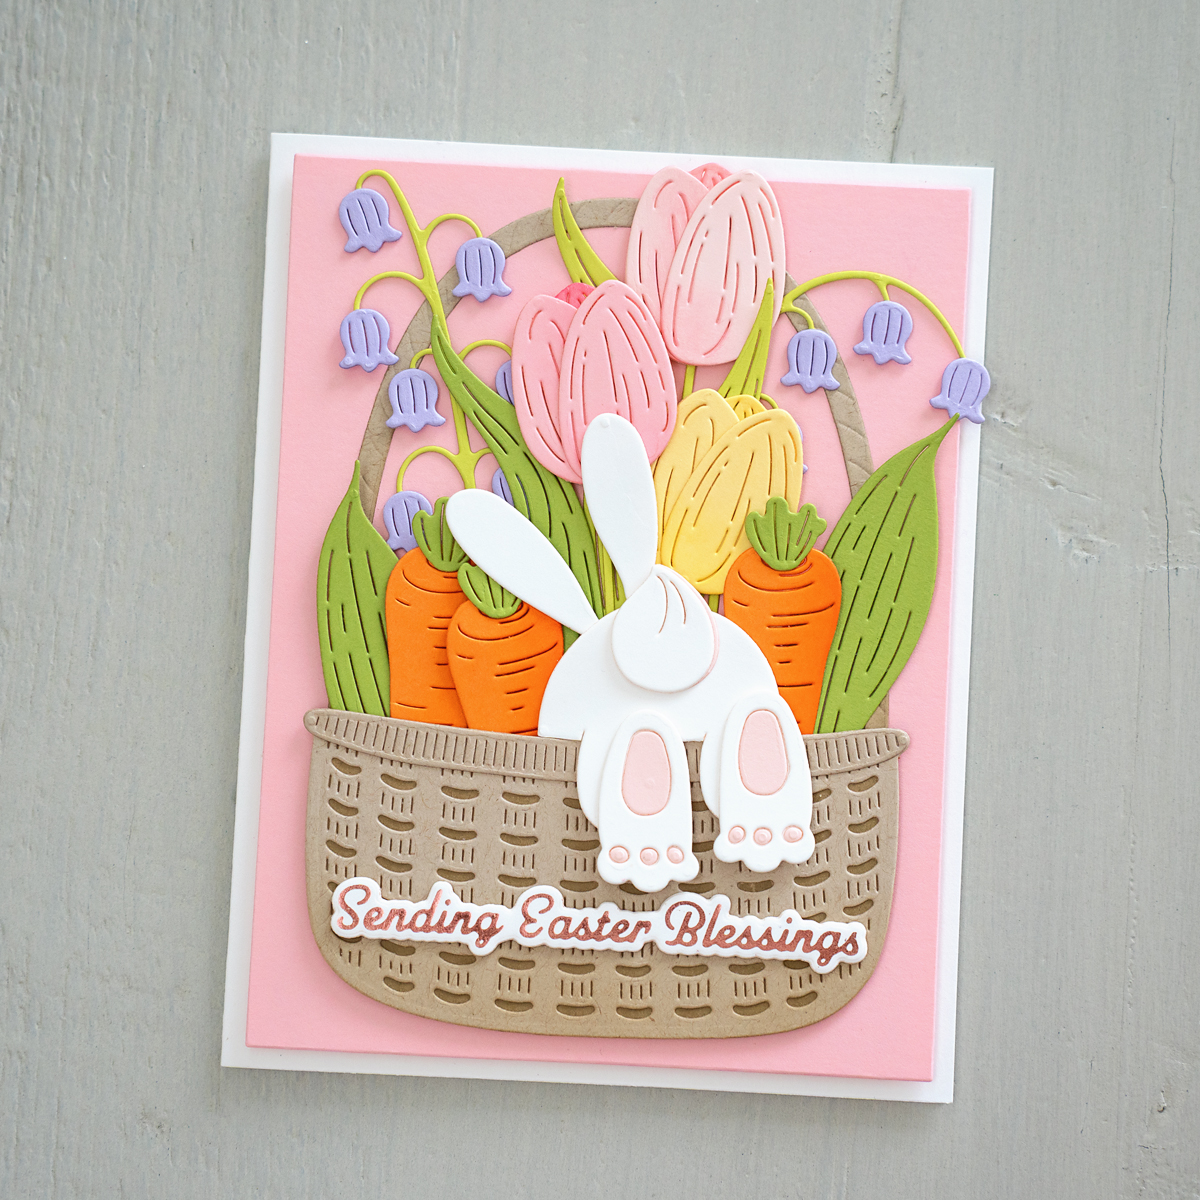
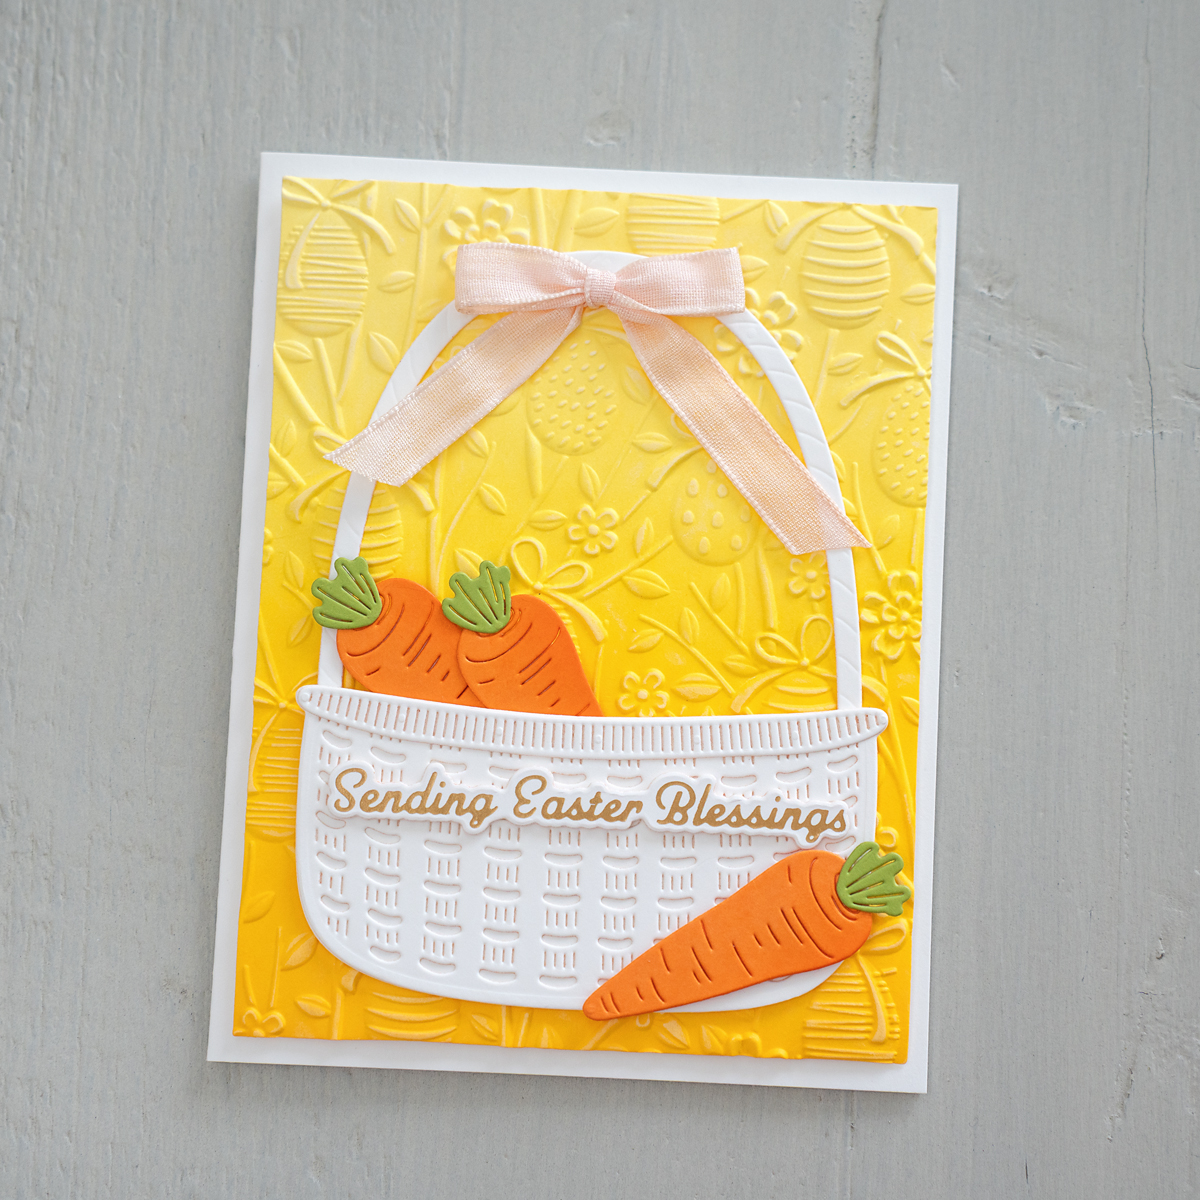
1. Large Die of the Month kit (DOML) called Floral Bunny Basket, with the sentiment from the Glimmer of the Month:
2. Small Die of the Month (DOM) called Rain Boot Bouquet, along with the Embossing Folder of the Month, and the Clear Stamp of the Month for the sentiment:
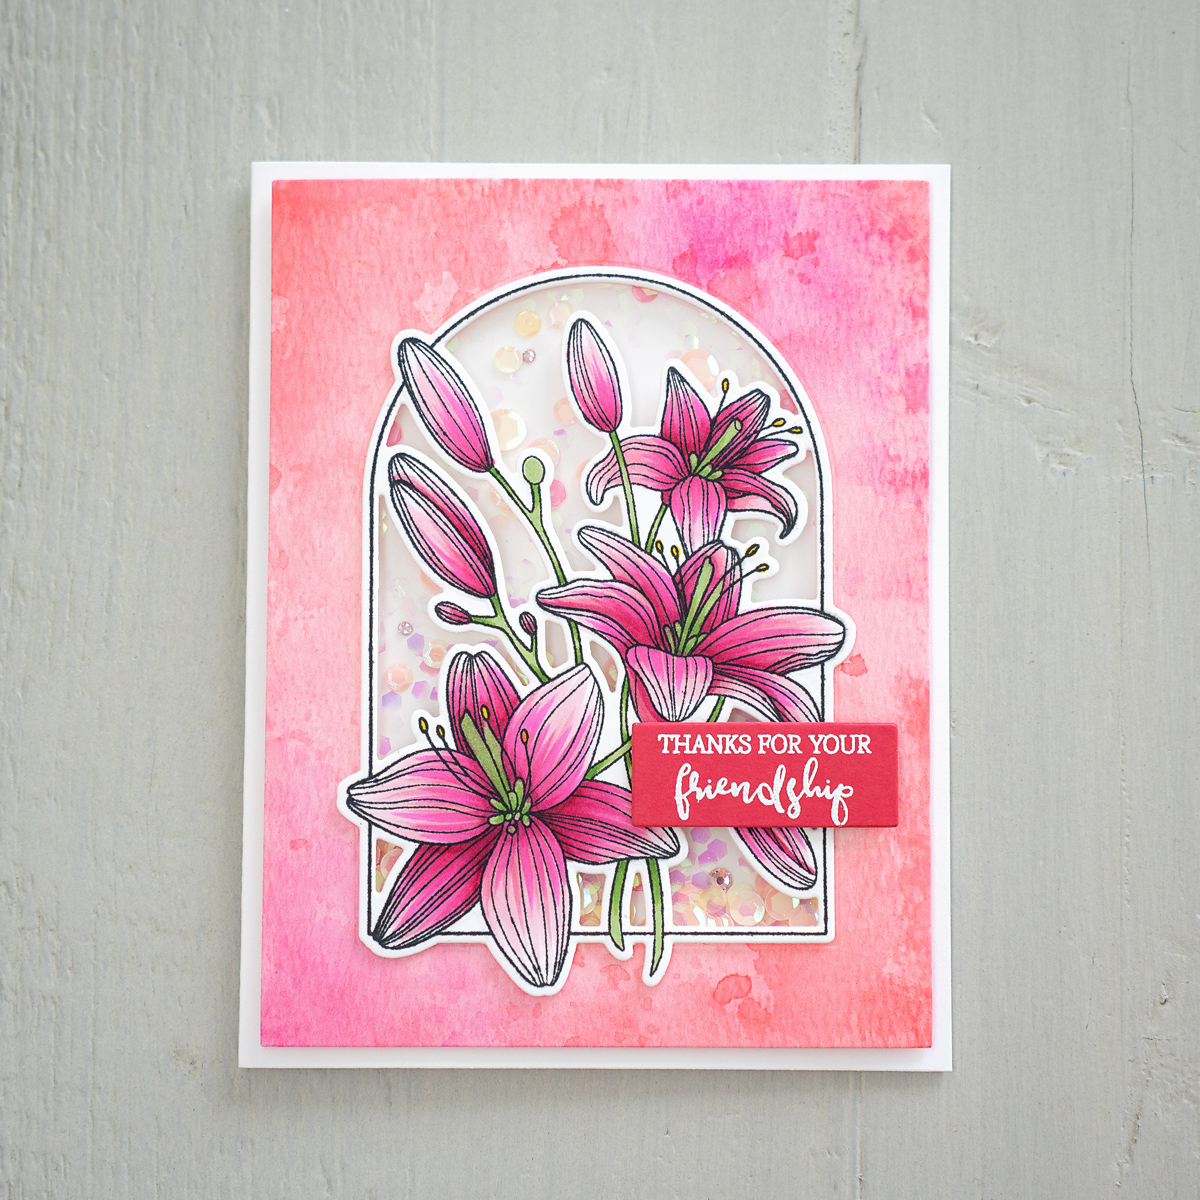
4. Wax Seal of the Month (WSOM) called Lily of the Valley, along with florals from DOML and Embossing Folder of the Month in the background:
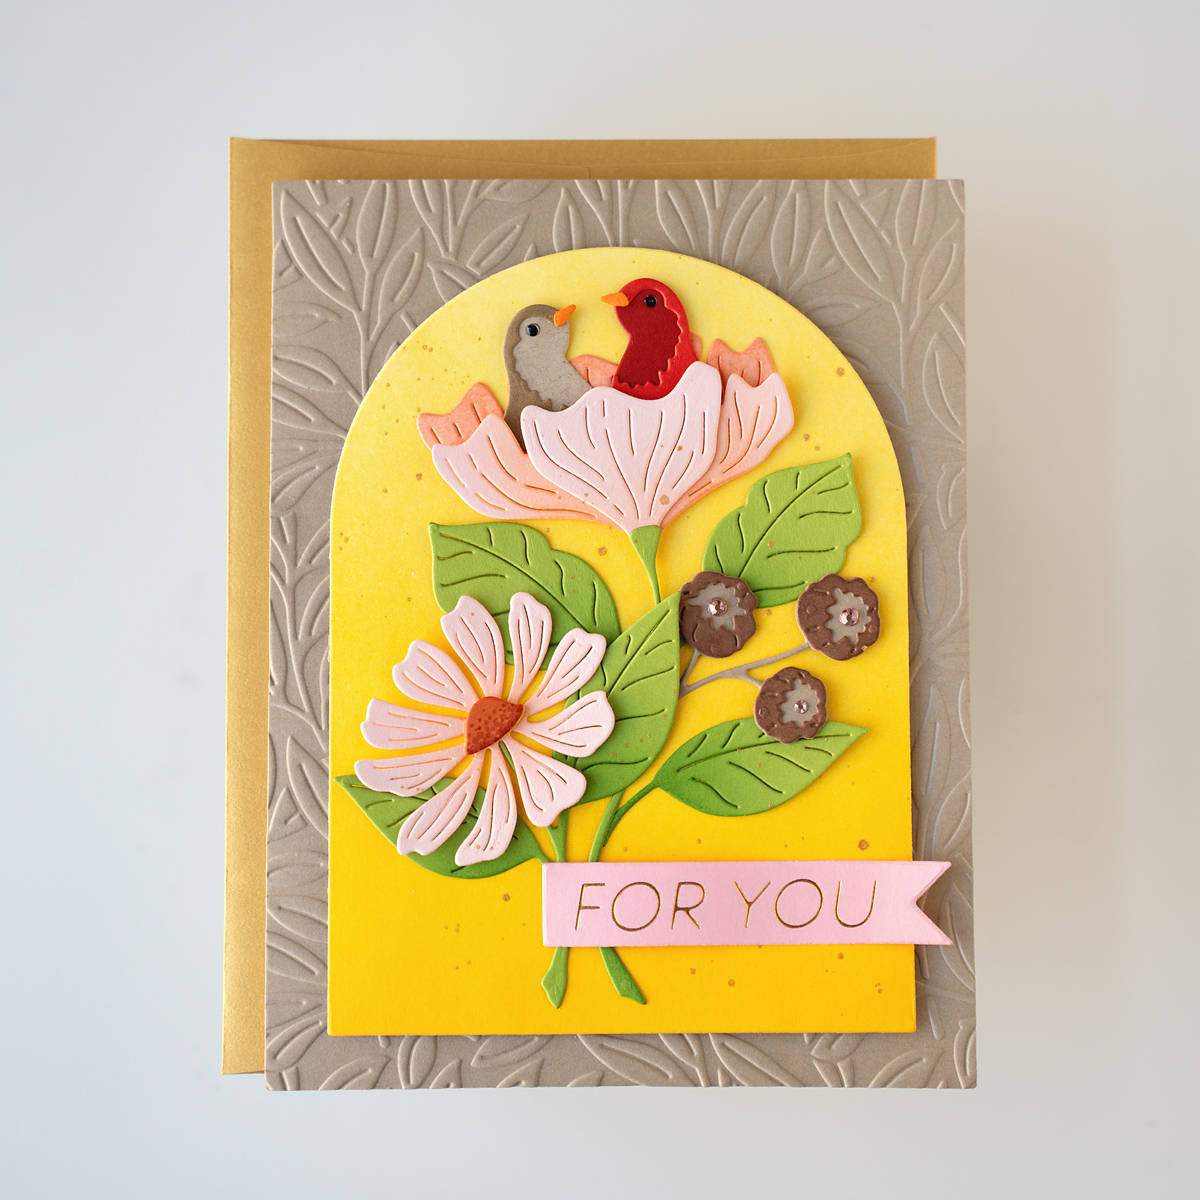
5. Embossing Folder of the Month (EOM) called Swirling Blooms, along with a humming bird from the Better Press of the Month, another humming bird, which is the February bonus item for Deluxe Caboodle Members, and the Embossing Folder of the Month:
I also used the Essential Arches Dies from Spellbinders on a lot of these cards. I hope you were inspired by my cards today. Check out the Spellbinders site to see all the club kits, along with lots of other paper crafting goodies.
I hope you got some inspiration from my cards today. Check out the Spellbinders site to see all the club kits, along with lots of other paper crafting goodies.
I hope you got some inspiration from my cards today. Make sure to stop by the Spellbinders site to check out all the club kits, along with lots of other paper crafting goodies.
Hello friends! Welcome to the Pinkfresh Studio October 2023 Release blog hop. You should have come from Jenn Shurkus‘s blog, and the next step on the blog hop after me is Karin Hogger. You can always go to the Pinkfresh Studio blog for a full list of the blog hop. There will also be giveaways for this blog hop, and I will list that information at the end of the post.
I made a bright yellow birthday card using the Nothing But the Best collection.
First, I started with the Nothing But the Best stencils. For the flowers, I used the rise and shine ink cube pack, and for the leaves, I used the over the hills ink cube pack. Once, I finished the 5 stencils, I used the coordinating floral stamp from the Nothing But the Best stamp set, stamped it with Versamark ink, and heat set with gold embossing powder. I also stamped the “Happy Birthday” sentiment on white cardstock with Versamark ink, and heat set with gold embossing powder. Using the coordinating Nothing But the Best dies, I diecut the floral image and sentiment.
Next, I worked on the background. I ink blended on a panel of white cardstock using the same yellow inks as the flowers, but a little darker and more intense. Then, I used the large Ornate Rectangle frame die to diecut the yellow inked panel. I also diecut the large ornate frame from white and brushed gold cardstock. On an A2 white cardbase, I first glued the outer portion of the ornate frame from the brushed gold. Then, I glued in the white cardstock for the tiny inner frame, and for the large inner portion, I used the yellow ink blended panel. Next, I glued on the sentiment, and then popped the floral image up with some foam squares. To finish off the card, I adhered some champagne glitter drops.
I love how bright and cheerful this birthday card turned out. Don’t forget to hop along to see lots of inspiration from this release!
Pinkfresh Studio is giving away the full release on the Pinkfresh Studio blog and YT channel.
Pinkfresh Studio will also be giving away a total of 10 $25 gift cards from the comments along the hop
Pinkfresh Studio will post the winners on Nov 6, 2023 on the GIVEAWAY PAGE. You must check that page to see if you are a winner. If you are a winner, you must claim your prize within 2 weeks.
Hello crafty friends, and welcome! I’m so happy to be joining the Waffle Flower Crafts October 2023 release and blog hop. Be sure to check out each stop in today’s blog hop for amazing inspiration and chances to win some of these new release goodies! Check out these fun products on he Waffle Flower website! Blog hop order and details will be listed at the end of the post.
First, I diecut the butterflies from various colors of cardstock. I added a little bit of tone-on-tone ink shading to the butterflies. Then, I used some coordinating DMC floss and chain stitched the middle of the butterflies.
For the background, I used a cloud stencil, like this cloudy stencil, with light blue ink. I adhered the background panel to an A2 cardbase with foam tape. Then, I glued the butterflies in a diagonal on the panel, making sure to add glue only to the center of the butterflies. For the sentiment, I used 2 of the sentiments from the Kindness Subsentiments to say “Stitched with Love.” To finish off the card, I added a few sequins.
I began by die cutting the flowers and leaves from cardstock. I used coordinating DMC floss and backstitched through the center of the flowers and leaves. Next, I diecut the thank you sentiment dies from gold cardstock, and 2 more times from white cardstock. I glued the sentiments stacked together for dimension.
I adhered the flowers and leaves to the left side of a white cardstock panel with by glue and foam tape. Then, I glued on the sentiment. To finish off the card, I added some light pink ink splatters and sequins.
I began by ink blending some clouds on a white cardstock panel. Then, I used the rainbow die to diecut the holes in the cloud panel. I used some DMC floss, and stitched through the holes. I used a few different stitches, the backstitch, the chainstitch, and the backstitch, but turned upside down. I also diecut the 2 clouds from white cardstock, and used white DMC floss to backstitch.
I adhered the cloud panel to a white A2 cardbase with foam tape. Then, I adhered the clouds with foam squares. For the sentiment, I used the Kindess Subsentiment saying “Just A Stitched Hello.” To finish off the card, I added some sequins.
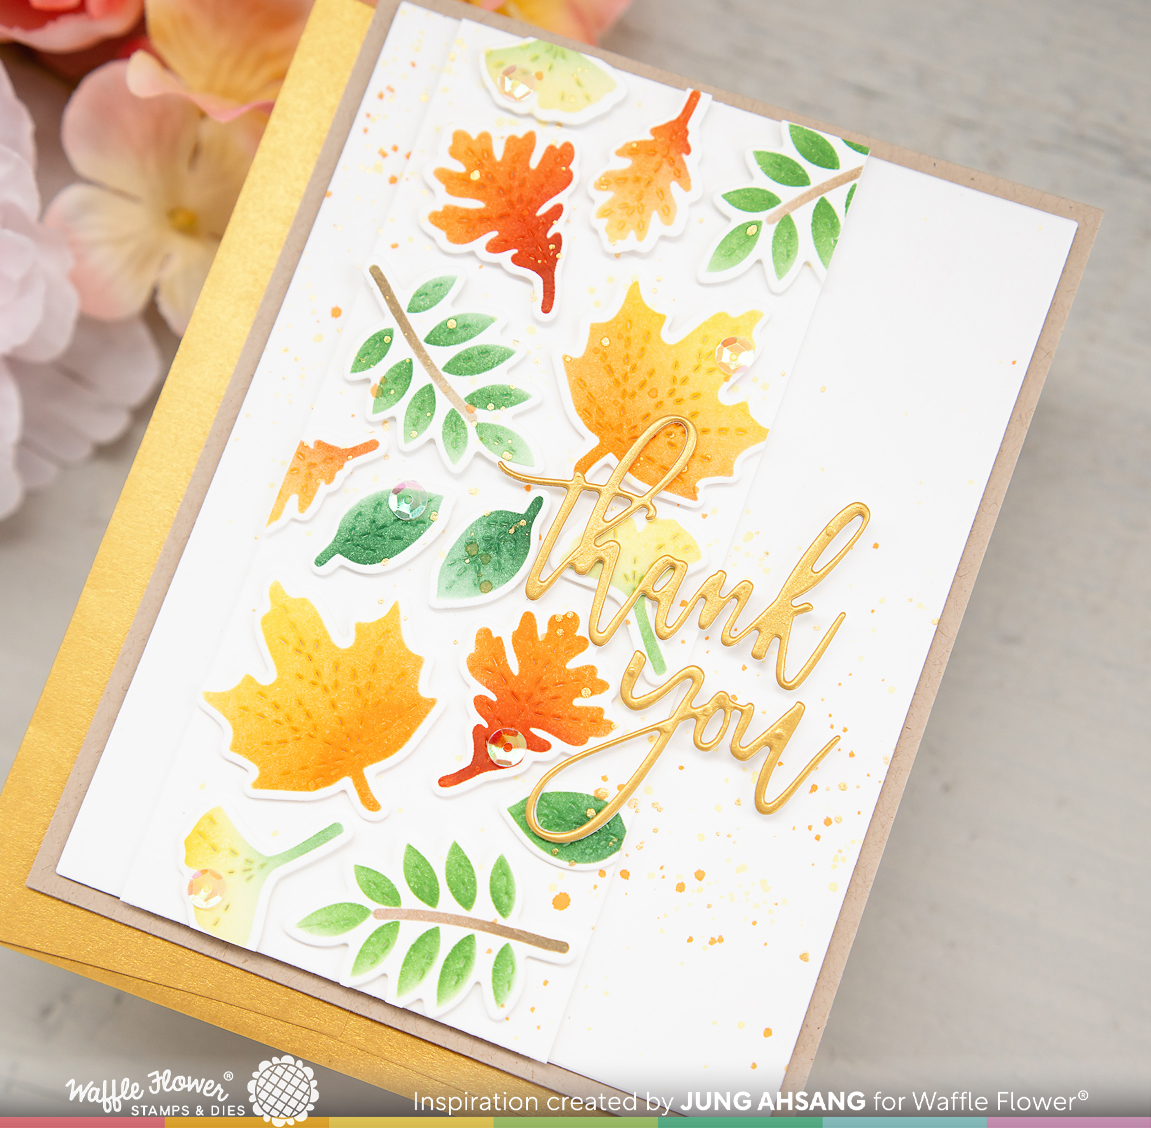
First, I began by using the stencil to shade the leaves with different colors of ink. Next, I used the dotted lines die to add the embossed vein lines for the leaves. Then, I used the coordinating dies to diecut the leaves. I made 2 sets of leaves. On a white cardstock panel that I trimmed to about 5 1/4 x 2 1/2 inches, I attached the leaves with foam squares. I cut off any leaves that were hanging off the panel. I adhered this panel to a white card panel with foam tape, and then adhered the entire panel to a craft colored A2 cardbase.
I diecut the script “thank you” sentiment once from gold cardstock and 2 more times from white cardstock. Again, I adhered them stacked together for dimension. I glued the script sentiment to my card. To finish off the card, I added gold paint splatters as well as some sequins.
I hope you like my cards and got some inspiration today!
For today’s hop, Waffle Flower is giving away $25 gift certificates at every stop of the hop, that’s a total of 3 chances to win! You can leave a comment on this blog and along the hop by 11:59pm EST on Wednesday October 11th, 2023 for your chances to win. Winners will be chosen at random from the comments and will be announced on the Waffle Flower Blog on Winner Thursday 10/12/2023.
SPECIALS:
From now till October 9th, 2023, all orders placed at waffleflower.com will receive an exclusive Dotted Butterfly Sampler Die (No code required!).
For those of you who are new to Waffle Flower, they have a Last Chance section on their website that lists many goodies for 25% off until they are gone! This would be a great place to start your collection! And don’t forget to check out their monthly Flash Sales!
Happy fall friends! It’s time for another round of my monthly big blog post featuring my projects using Spellbinders October 2023 club kits. I hope y’all enjoy!
I diecut all the pieces, and assembled. Everything is relatively simple to piece together. I just love how these dies fill up an entire card! For the background, I used blue inks and did an ink blended sky. I also added white paint splatters for a snowy effect.
I diecut all the pieces first. For the large tree, I ink blended green inks on a white cardstock panel. For the background, I ink blended blue inks for a subtle sky. Next, I used metallic DMC floss to stitch the tree and a couple of the ornaments. I adhered the background panel, the tree, the ornaments, and the sentiment. I added some red stars (from the sequin pack that came in the card kit of the month), and white paint splatters.
For my next card, I stitched another tree, and used the 3D embossing folder of the month (3EOM) called Flowering Christmas Tree Burst for my background.
I ink blended green inks for the background, and ran it through my Platinum 6 with the embossing folder. I stitched the tree with gold DMC and adhered it to the card. I diecut the sentiment from gold, and adhered it to the tree.
I stamped the trio of penguins, and an extra present, and then colored them with Copic markers. I used the coordinating dies to die cut them out. For the background panel, I ink blended with blue inks to create a sky. I stamped the sentiment to the upper left corner, and heat set with white embossing powder. I freehand cut some white snow hills, and layered them onto the background. I added some white paint splatters. I adhered the colored images with foam tape. To finish off the card, I adhered some more of the stars.
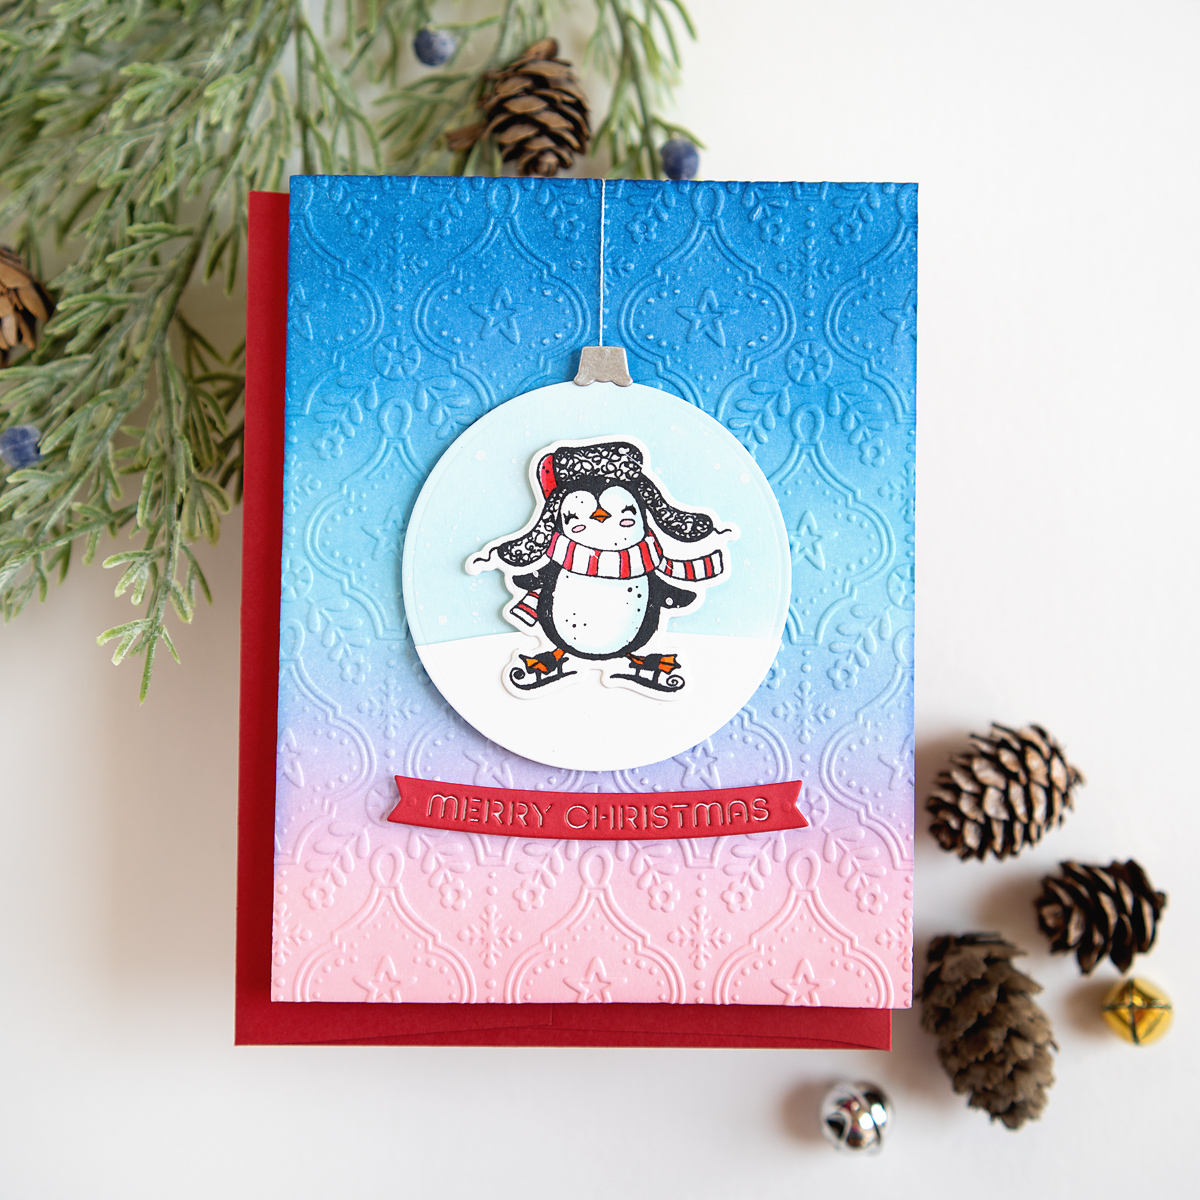
For my next card, I used a penguin from the stamp set, and also the Embossing Folder of the Month (EOM) called Christmas Tiles.
I stamped, colored, and diecut the penguin. I wanted it to look like an ornament, so I diecut a circle from blue cardstock. I also freehand cut a snow hill, and diecut it using the same circle die. I adhered the show hill to the circle, and then the penguin. To make it look like an ornament, I used one of the ornament top die from the Stitching club kit. For the background, I ink blended pink, and blue inks on a piece of white cardstock. Then, I ran it through my Platinum with the embossing folder. I diecut the sentiment from red cardstock, adhered it to the background along with the ornament.
Again, I diecut the pieces, and assembled the Santa. For the background, I ink blended a sky with blue inks, then added white paint splatters. I freehand cut another hill from white cardstock, then adhered it to the background. For the flag, I used the Ho Ho Ho sentiment. There is also a coordinating stamp set called Big Jolly Santa Sentiments with sentiments that you can stamp on the flag. I stamped “Santa’s Favorite” on the hill with red ink. I adhered Santa to the card with foam squares.
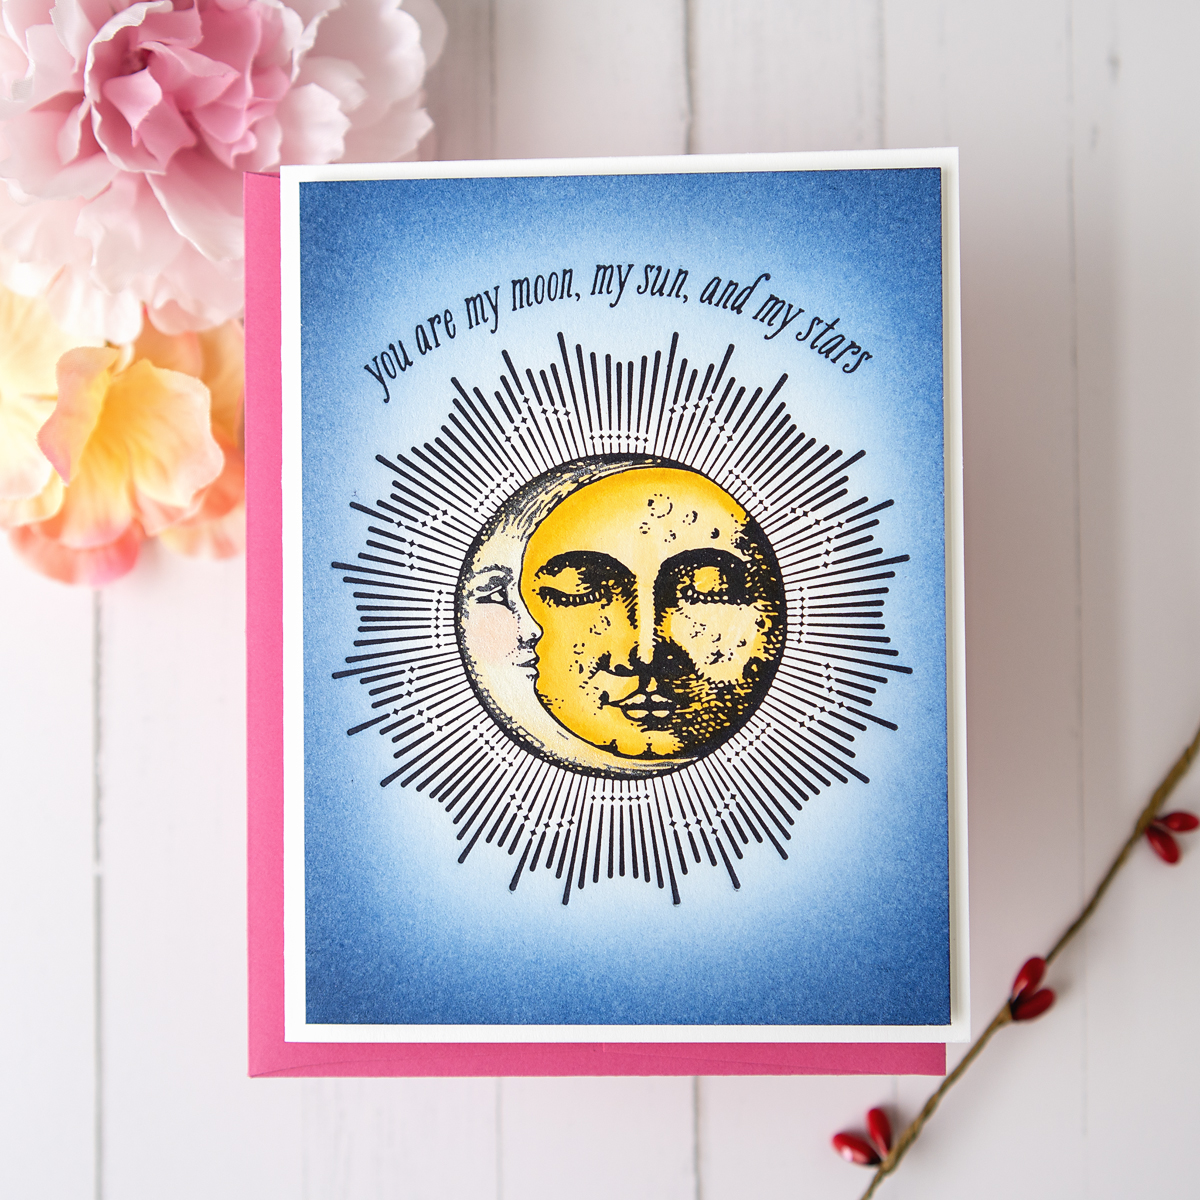
I used the packaging technique, and did some ink smooshing on a piece of porcelain BetterPress cotton card panel. Once fully dry, I used the betterpress plate and black ink to get my stamped/embossed image onto the center of the panel. I added some white paint splatter (I covered the middle with my hand to avoid getting paint on the text), and a few red stars.
I foiled the floral image using my Glimmer Hot Foil Machine and Polished Brass foil on smooth white cardstock. I used my Copic markers to color the image. Then, I foiled the bow and Joy sentiment on a piece of cardstock that I ink blended with red ink. I used the coordinating dies to diecut them out. I adhered them to the card on top of the floral. I trimmed the panel on the sides, then adhered it to a red cardstock panel that I diecut from fluted rectangle dies.
Finally, for my last card, I used pieces from the Large Die of the Month, 3D Embossing Folder of the Month, and the Wax Seal of the Month (WSOM) called Merry Christmas To You.
I ink blended the background panel with blue and green inks. Then, I ran it through my Platinum with the 3D embossing folder. I also diecut a few poinsettias. I used the Wax Seal of the Month, and the gold pen to make the wax seal. I wrapped the background panel with gold DMC floss a few times. Then, I adhered the poinsettias and the wax seal. I finished the card with a few red gems.
Whew, and there’s my Spellbinders Club Kits roundup for October 2023! I hope you got some inspiration from my cards. Make sure to stop by the Spellbinders site to check out all the club kits, along with lots of other paper crafting goodies.
Hello crafty friends! It’s time for another round of my monthly big blog post featuring my projects using Spellbinders September 2023 club kits. I hope y’all enjoy!
I love how these cards turned out! There are so many dies in this kit to create the cutest fall and Halloween cupcakes. There is also a companion die set to create different seasonal cupcakes as well. First, I diecut all the pieces using my Platinum 6 die cutting machine. I added a bit of ink blending to some of the pieces, then assembled. I set the pieces aside, then worked on the background. I ink blended a couple panels of white cardstock, then trimmed, and then ran through my die cutting machine with the embossing folder. I adhered them to a white card panel with foam tape, and then all the diecut pieces.
I stamped and gold heat embossed the fall bouquet on white cardstock, and then colored with Zig clean color real brush pens. I used the coordinating die to diecut the image. I ink blended a panel of white cardstock for the background. Then, I heat embossed the sentiment in the lower left corner. I wrapped some gold DMC thread around the background panel, then adheared the colored image on top with foam tape. To finish off, I added some gold gems.
Next, I made a card using another stamped image from the CDOM and the Wax Seal of the Month (WSOM) called Fall Meadow.
Like my last card, I stamped, gold heat embossed, colored the pumpkin image, and diecut using the coordinating die. I stamped the sentiment to the lower right, and gold heat embossed onto a craft cardstock background. I also wrapped the background cardstock with gold DMC floss. I adhered the colored image with foam tape. I also added a few diecut and inked leaves from the DOM. Last, I used the Wax Seal of the Month, and the gold pen to make the wax seal. I adhered it to the panel just under the pumpkin.
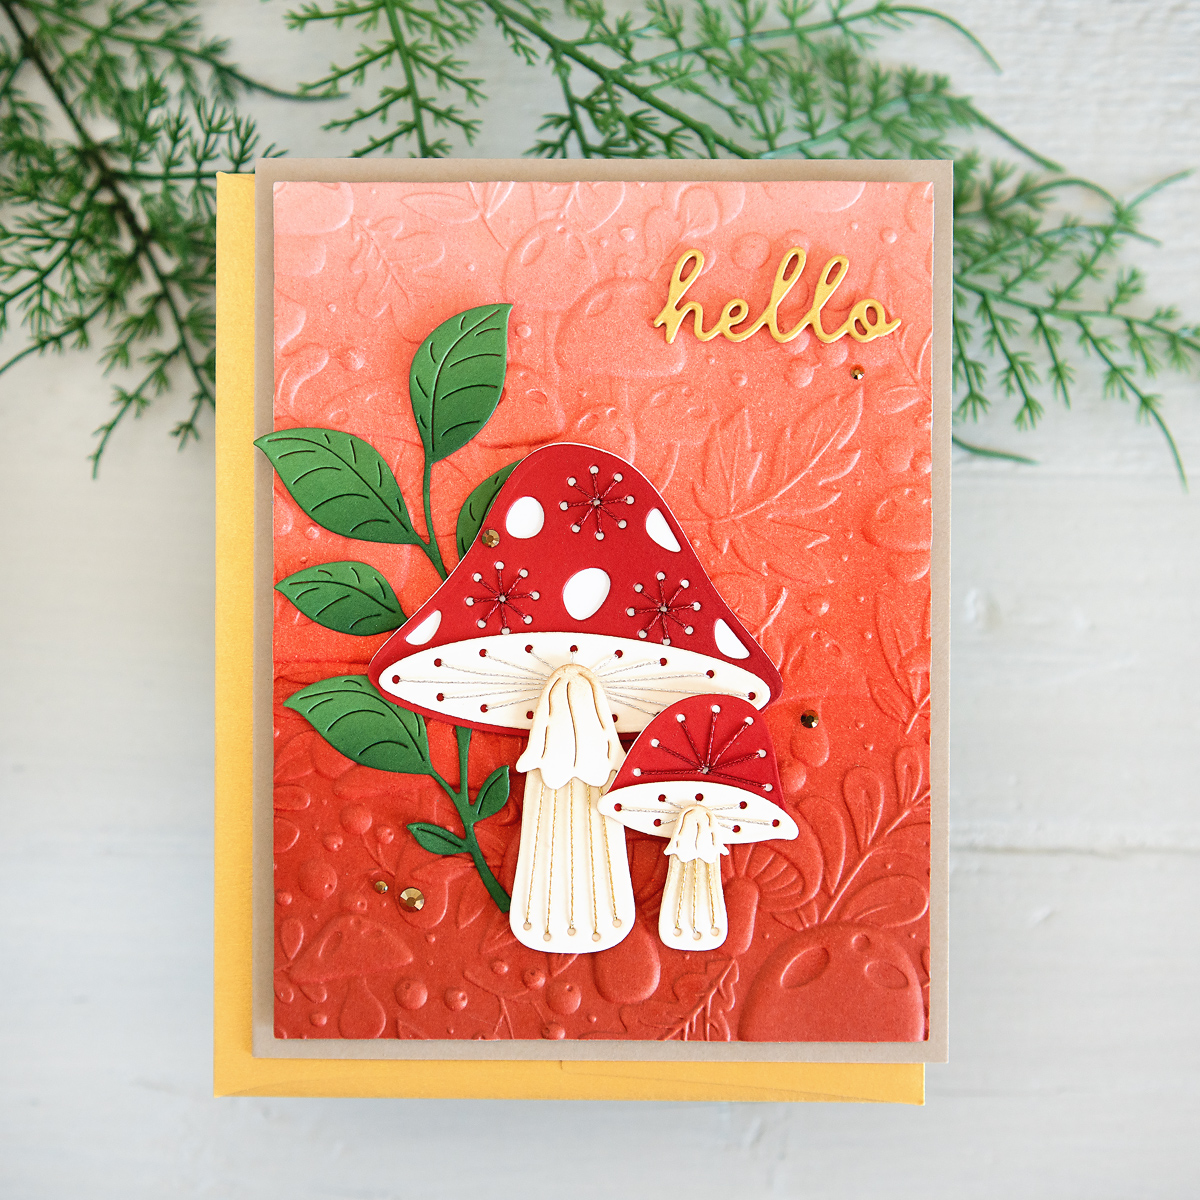
First, I diecut the pieces for the mushroom. I used gold and red metallic DMC floss to stitch on the pieces. I adhered the mushroom pieces together. Then, I diecut the leaves and the hello sentiment. For the background, I ink blended a panel of white cardstock, trimmed it, then ran it through my Platinum with the 3D embossing folder. I adhered it to a craft cardbase. Then, I adhered the diecut elements.
I diecut all of the pieces, and added a little ink blending. Then, I assembled the boots and florals. For the background, I ink blended some yellows. I adhered the background to the card panel, then the boots, then the florals, and finally the sentiment.
I ink blended a panel of smooth white cardstock with yellow inks. Then, I foiled the large sunflower image using my Glimmer Hot Foil Machine and Polished Brass foil. I used the coordinating die to diecut the upper portion. On a piece of craft cardstock, I foiled the sentiment in the upper left portion. I trimmed both the craft cardstock and the foiled sunflowers. I adhered the sunflowers to the craft cardstock using foam tape. Then, I adhered that to a white cardbase. I finished with splatters of gold paint, and added gold gems.
I did a gradient watercolor wash on a piece of porcelain BetterPress cotton card panel. The, I used the BP plate along with the black ink to get the image on the lower left corner. On another piece of cotton panel, I added a quick watercolor wash, then used the sentiment BP plate with black ink. I used the coordinating die to diecut the sentiment. I adhered the large floral panel to an A2 cardbase, the, the sentiment with foam tape. I finished the card with gold gems.
I love how these fall cards turned out. If only we could get out of the 100 degree weather, I would be in more of a fall mood, haha! I hope you got some inspiration from my cards. Make sure to stop by the Spellbinders site to check out all the club kits, along with lots of other paper crafting goodies.